In Building an Augmented Reality Sandbox, I provided a brief history leading up to the assembly of my university’s first augmented reality sandbox (ARS).
Now, I want to layout in as graphic of detail as possible the steps necessary to bring our ARS to fruition. One of the most frustrating things about the Internet is all of the fantastic DIYs and HowTos and all the critical steps omitted. I watched a 9:00 minute YouTube video on removing a broken bolt from an exhaust manifold and the meat-and-potatoes demonstration of the technique lasted no longer than about 15 seconds.
By using images and videos and supplementary web sites, I will walk us through designing and building a sandbox. Along the way, I will share my experience and where I intend to develop the sandbox further.
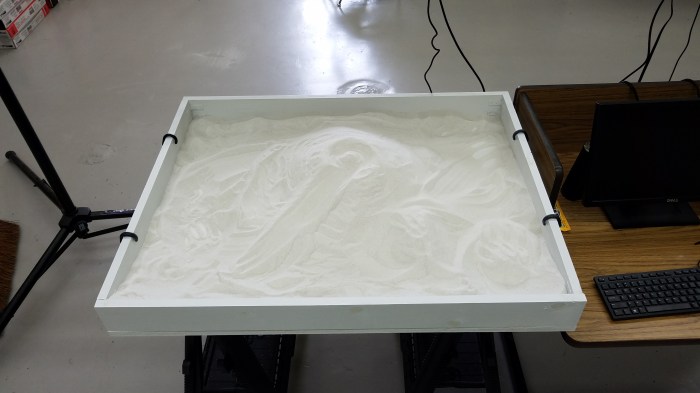
My director, Dr. Kit Wesler, built the actual sandbox, that is, the box containing the sand. Our box is about 36 inches by 40 inches by 4 inches. Two plastic sawhorses support the sandbox. Two long bungee cords help stabilize the sandbox upon the sawhorses. Kit constructed the box at home. He had the hobby of building furniture so building a simple box was directly in his skill set.
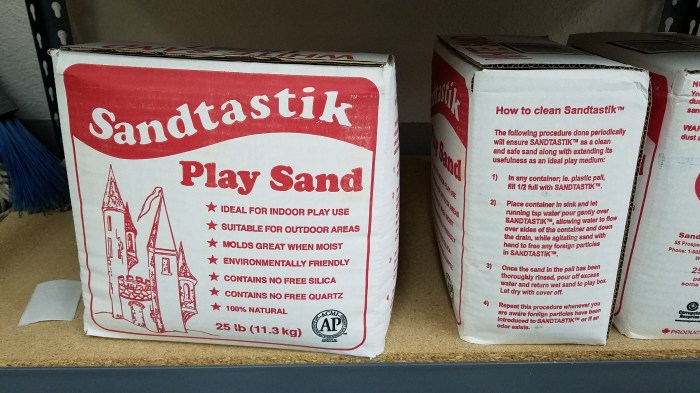
We didn’t use regular playground sand. Instead, we ordered Sandtastik White Play Sand (sandtastik.com). White sand is important to enhance the visual properties of the sandbox. As you’ll see later, the colors are nice and vivid. We didn’t believe ordinary sandbox sand would provide nice crisp colors. I did not witness Kit pouring in the sand but my estimate for the size of box we have – which is on the large size in comparison to other ARS I’ve seen – is he used about 200-lbs of white play sand, or about eight boxes of sand.
Yes, the sandbox is not as portable as I would like. It’s heavy.
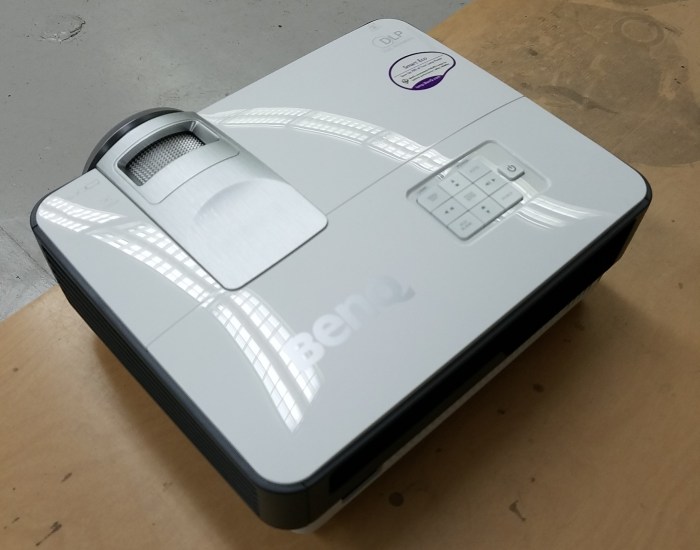
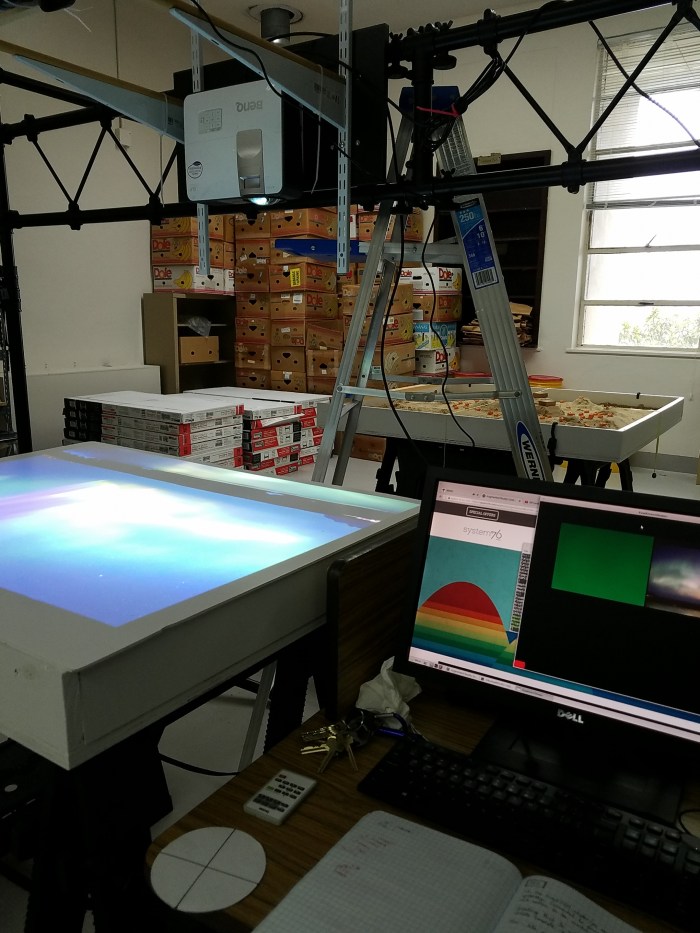
A data projector is necessary. And not just any data project but a short-throw data projector. We bought a BenQ MX631ST short-throw data projector for about $800. A short-throw was necessary as the image needed to be fairly large for our sandbox and the data projector needs to be fairly close, about 60cm, from the surface of the sandbox. Another bit of geometry to be worried about is the Microsoft Kinect. For best performance, the Kinect needs to be positioned above the centerpoint of the sandbox. This is the placement of a regular-throw data projector, normally. A short-throw projector is placed above the sandbox but near the back edge of the sandbox. The Kinect is then placed at the same height as the data projector and directly over the center of the sandbox.
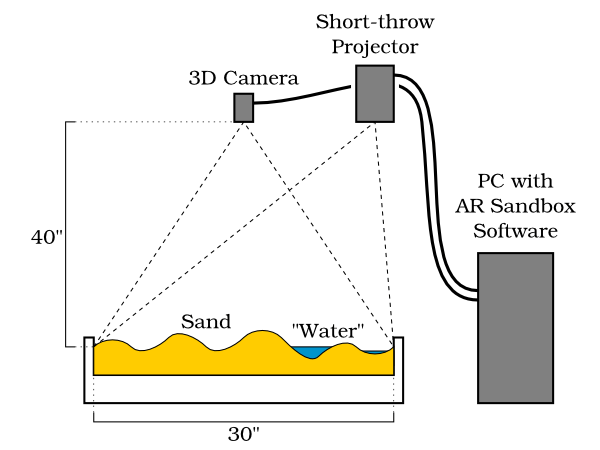
The above graphic (source: https://arsandbox.ucdavis.edu/instructions/hardware-2/) depicts the alignment of some of the various components. There is no true water; the water illustrated above is part of the simulation. No real water, or any fluid, for that matter, is necessary for this sandbox. That is sort of the point, honestly.
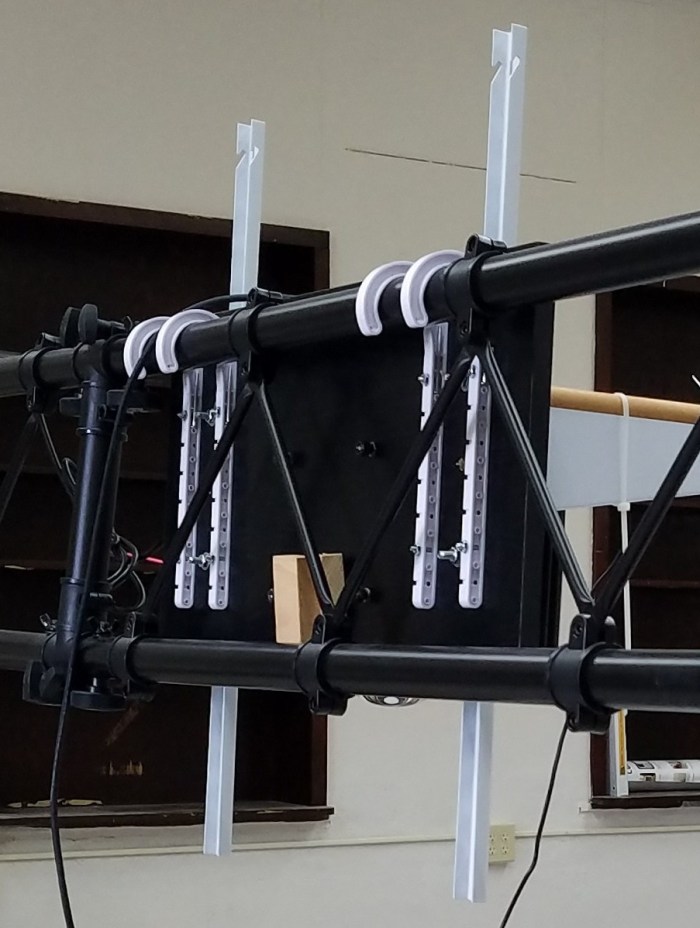
Above, my data projector is attached to the truss system, with the brackets to hold the Kinect in place. Notice the truss system is aligned along what I will refer to as the “back” of the sandbox. The Kinect sensor is mounted at the end of two 18-inch brackets, midway up from the front of the data projector.

Some thing to mount the data projector and Kinect is necessary. We bought a truss system for rigging stage lights. This was probably over-kill. I am looking at a more portable system like this one (left) so I can make this system more mobile.
The computer monitor would be attached to one side, the data projector attached to the opposite side. The computer would sit in a CPU caddy near the bottom.
The display apparatus could be wheeled around. I need a cart to haul the sandbox around. Or add handles and a sand-tight lid to the sandbox. And, two or three people. Or, simply a smaller sandbox.
For the definitive resource on the ARS check out Dr. Oliver Kreylos’s Augmented Reality Sandbox’s hardware requirement page.
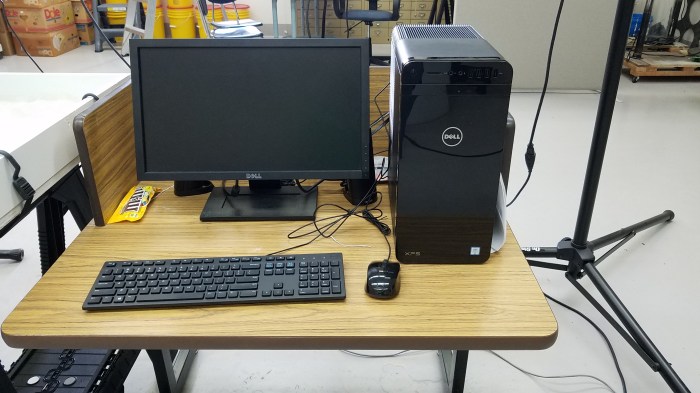
The next essential elements of the Augmented Reality Sandbox is the computer and related graphics card. I opted to buy a Dell XPS. One of the more frustrating aspects of this endeavor was finding a computer with a decent power supply to supply power to the graphics card. The recommended graphics card is the NVidia GeForce GTX 970 or 1070. Not only is a decent power supply necessary but this is a large graphics card (graphics processing unit (GPU)), and a big workstation is necessary just to hold the card. Most higher education / business class Dell computers have an anemic 240W power supply. I ordered a Dell XPS with a 500W power supply. This order required me speaking directly with my Dell representative and explaining precisely what I was doing and why I had to order off-contract.
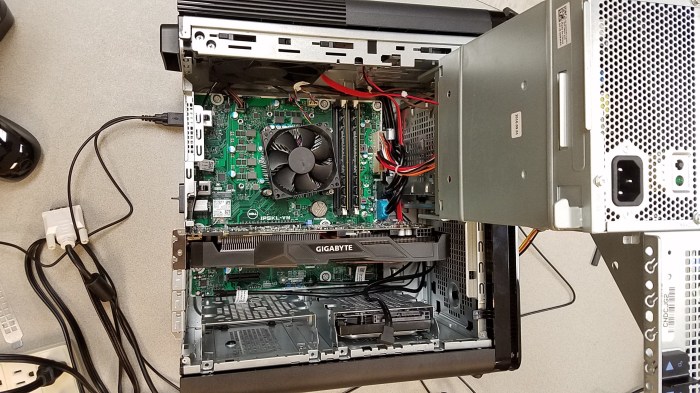
The narrow black rectangle running the width of the computer case is the Gigabyte Nvidia GeForce GTX 1070 GPU. Other graphic cards are possible, the sacrifice is the lack of water and rain simulation. With some clever shopping, the Gigabyte graphics card can be found for around $400 or so.
 The ARS does not support Windows, so I ordered my Dell XPS without an operating system. I downloaded and installed the latest version of Linux Mint, which was 18.1 at the time I assembled this project. (https://www.linuxmint.com/)
Once Linux Mint has been installed and patched, the ARS requires some specialized software available from the University of California – Davis.
Installing software packages in Linux is pretty straight-forward. Three separate installs are necessary, VRui, Kinect, and SARndbox. VRui is the virtual reality user interface toolkit. Kinect applies the necessary drivers to make the Kinect work. SARndbox is a suite of software tools to verify the different components are talking to one another, calibrate the components, and run the simulation. I recommend installing the default directories recommended in the software for the SARndbox.
The apps necessary to run the simulation do not run from a point-and-click interface. This may be off-putting to people conditioned to using a graphical user interface. The software tools run from command line, i.e. typing a command string into a text window. Having someone around who is comfortable with command line may help ease the pain.
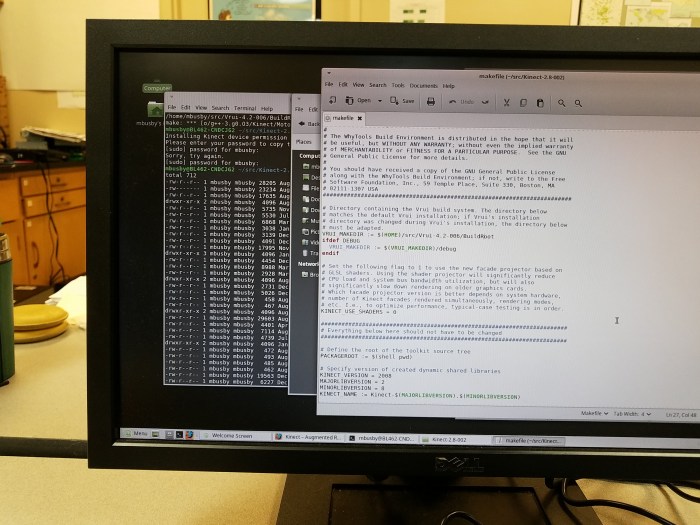
Above, I have provided some sample windows of what this installation looks like. The top-most window is the “Make” file for the Kinetic software. The window in the rear is an example of a terminal window with some results of Linux commands I issued. Don’t let this startle you, I’m just sort of messing around. I grew up in an AIX and Sun Solaris Unix environment, plus MS-DOS, PC-DOS, and Windows, so I spent some time trying to get reacquainted with Linux commands, honestly.
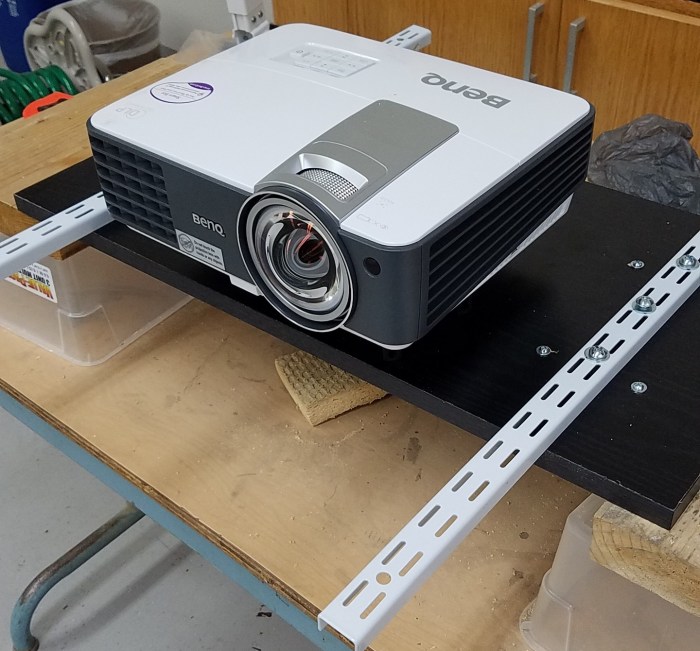
I bought a Rubbermaid shelf and two shelving rails from Lowe’s. On the back side of the board I attached plastic pipe hangers from Lowe’s.
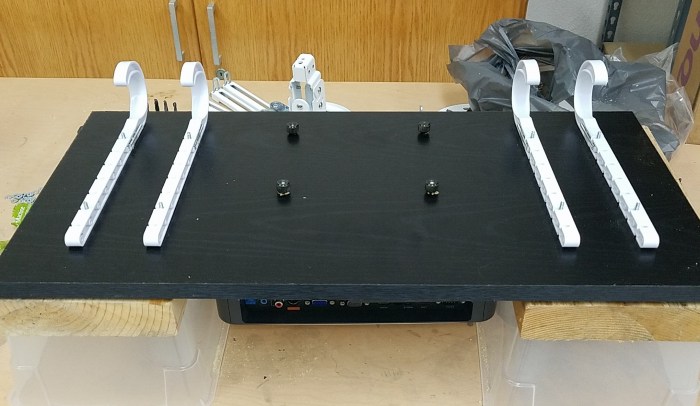
The four bolts in the middle are from a spare ceiling mount I had in inventory. The spare ceiling mount was very convenient. I’ve seen other setups with data projectors strapped to plates or brackets. The ceiling mount was really handy, so if you can find one, use it.
The pipe hangers were convenient, too, if only they were a little longer to catch the lower truss. To compensate, I am using a door stop to plumb the projector.
The Augmented Reality Sandbox needs to be configured for the size of the sandbox you built. The ARS also needs to be calibrated for image size and for distance above the box. Or, the distance above the sand. Or, the top of the sandbox. The Kinect doesn’t calibrate itself; you will have to provide parameters for the resolution of your data projector, like 1024 x 768, 800 x 600, 640 x 480. I’m just tossing those resolutions out as examples. When a data projector is configured, image size and resolution typically get to be chosen, Just jot this info down so you’ll have it ready for calibration time.
The Kinect drivers need to know the distance above some base. The recommended base is simply the bottom of the sandbox – before sand. My box already had sand in it. I tried to level the sand but leveling sand is not exactly easy. I decided to use a large piece of foamboard as my flat base. During the Kinect configuration phase, you’ll be presented a distance from the base plane to the Kinect. You’ll need to determine the the height (in centimeters) of the of the inside of the sandbox, and then add this value to a value in a text file.
Here is where I am going to break out, re-direct you to System76, a custom-computer manufacturing company. They have a nice blog covering weekend projects, and the ARS is a weekend project (sort of). System76 has a very detailed collection of instructions with screen-shots (link).
One thing you will want to consider is setting an evaporation rate. Near of the end of the System76 instructions, they present the command line launch command for the sandbox:
SARndbox -uhm -fpv -evr -0.005The -evr option allows the user to set an evaporation rate. The default is no evaporation so the simulation will allow water to accumulate and never evaporate. Experiment with values between 0.02 and 0.005 (higher values equal higher evaporation rates).


